Have you ever wanted to create a cute toy dog all by yourself? Making your own toy dog is easier than you think, and it’s a fun way to add a personal touch to your home or gift something special.
In this guide, you’ll learn simple steps to craft a toy dog that looks charming and feels soft. Whether you’re new to crafting or just looking for a new project, this article will show you how to bring your own toy dog to life, step by step.
Keep reading—you’re about to discover how satisfying and enjoyable making a toy dog can be!
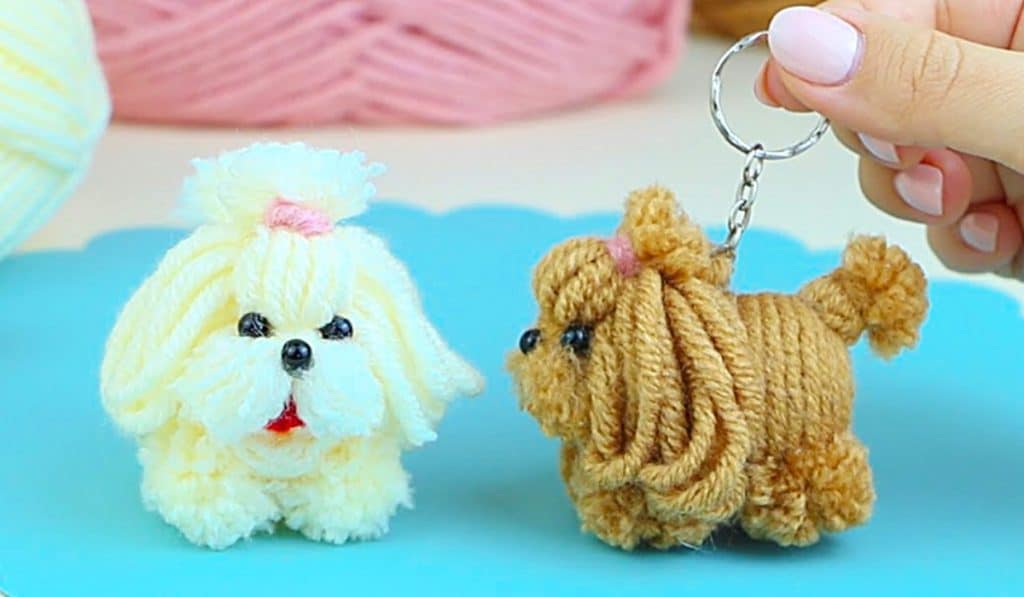
Credit: diyjoy.com
Materials Needed
Gathering the right materials is the first step to making a toy dog. The materials you pick affect how your toy looks and feels. Choose items that are safe and soft. This makes the toy perfect for kids or as a decoration. Below are the key materials you need to start.
Choosing Fabrics And Fillings
Pick soft fabrics like fleece, cotton, or felt. These materials are easy to sew and gentle to touch. Avoid rough or stiff fabrics that might hurt small hands. For stuffing, use polyester fiberfill or cotton batting. These fillings keep the toy fluffy and light. You can also use scraps of fabric for a firmer feel.
Essential Tools
Basic sewing tools make the project easier. You will need needles, thread, and scissors. A sewing machine helps speed up the process but is not required. Pins or clips hold fabric pieces together. A fabric marker or chalk helps draw patterns. These tools help create neat and tidy stitches.
Optional Decorative Items
Add buttons or beads for eyes and nose. Use ribbons or lace for collars or bows. Fabric paint or markers can add small details. These decorations give your toy dog personality. Choose items that are safe and well attached to avoid choking hazards.

Credit: www.youtube.com
Selecting A Design
Choosing the right design is the first step to making a great toy dog. The design sets the style and size of your toy. It guides you through cutting and sewing. Picking a simple design helps avoid mistakes and keeps the project fun. You can start with easy shapes and add details later. A clear design makes the process faster and more enjoyable.
Think about the size and shape you want. Do you want a small, cuddly dog or a bigger one? Deciding early helps with choosing fabric and materials. The design also affects how the toy will look when finished. A good design balances simplicity and charm.
Simple Patterns For Beginners
Simple patterns use basic shapes like circles and rectangles. These are easy to cut and sew. Choose patterns with few pieces to join together. Simple designs help practice sewing skills without stress. They also save time and reduce errors.
Start with a pattern that has clear instructions. Look for one that uses basic stitches. A simple face and body shape make the toy look cute. Avoid complicated details like tiny ears or paws at first. You can add these later as you gain confidence.
Customizing Your Toy Dog
Personalize your toy dog by changing colors and fabrics. Use different cloth types for texture and feel. Add buttons or embroidery for eyes and nose. These small touches make the toy unique.
Try different shapes for ears, tails, or spots. Mixing materials gives your toy character. Customize the size to fit your needs. A small toy dog can be a keychain. A larger one can be a comfy pillow.
Customizing keeps the project exciting. It lets you express creativity and style. Each toy dog becomes one of a kind.
Cutting The Fabric
Cutting the fabric is the first big step in making your toy dog. This part needs care and focus. Accurate cutting helps all pieces fit well during sewing. It saves time and prevents problems later. Let’s look at how to prepare and cut the fabric properly.
Preparing Your Pattern
Start by printing or drawing your pattern on paper. Check the size matches the toy dog you want. Use scissors to cut out the paper pattern carefully. Pin the pattern pieces to the fabric. Make sure the fabric is flat and smooth. Use a fabric marker or chalk to trace around the pattern. Mark any details like seams or notches. Remove the pins and pattern paper before cutting.
Tips For Accurate Cutting
Use sharp fabric scissors for clean cuts. Cut slowly and follow the traced lines exactly. Keep the fabric flat on a hard surface. Avoid lifting the fabric while cutting. Cut one layer at a time unless the fabric is thin. Double-check the shapes after cutting. Keep small pieces safe so you don’t lose them. Accurate cuts lead to a neat and well-shaped toy dog.
Sewing The Pieces
Sewing the pieces of your toy dog is an important step. It brings the parts together and shapes the toy. This process needs care and patience. Choosing the right sewing method makes the toy strong and neat. Let’s explore the options and stitches to use.
Hand Sewing Vs Machine Sewing
Hand sewing gives you control. It lets you sew small parts carefully. You can fix mistakes easily. This method is good for beginners and detailed work.
Machine sewing is faster. It creates strong, even stitches. This method is great for large pieces. It saves time but needs practice to handle small parts well.
Stitch Types To Use
Use a running stitch for simple seams. It is easy and quick. Perfect for joining most pieces.
A backstitch is strong and tight. Use it for parts that need extra strength. It keeps the toy durable.
Whipstitch works well for closing openings. It hides the seam and looks neat. Ideal for finishing touches.
Stuffing And Shaping
Stuffing and shaping are key steps in making a toy dog soft and cute. Proper stuffing helps keep the toy firm and gives it a nice shape. Shaping the toy well makes it look more like a real dog. These steps need care and the right materials.
Choosing The Right Stuffing
Select stuffing that is soft but holds shape well. Polyester fiberfill is popular and easy to find. It feels soft and is safe for kids. Cotton stuffing is natural but can clump over time. Avoid stuffing that is too hard or too loose. The right stuffing keeps the toy cuddly and lasting long.
Techniques For Even Filling
Fill the toy slowly and evenly. Start with small amounts in corners and tight spots. Press stuffing gently to avoid lumps. Use a tool like a chopstick to push stuffing inside. Check shape often to keep it smooth. Even filling helps the toy keep its form and feel nice to touch.

Credit: smart.dhgate.com
Adding Details
Adding details brings your toy dog to life. It makes your creation look cute and real. Small touches create big differences. Focus on the eyes, nose, and extra features. These parts give your toy its own personality.
Attaching Eyes And Nose
Start with the eyes. Choose buttons, beads, or safety eyes. Sew or glue them carefully on the face. Place them evenly for a balanced look.
Next, add the nose. Use a small black button or felt piece. Sew it firmly in the center of the face. This makes your toy dog look friendly and complete.
Embroidering Features
Embroidery adds soft details like the mouth and eyebrows. Use simple stitches and thread colors that match your dog’s fur. Keep your stitches small and neat.
This step adds expression and charm. It helps your toy dog look alive and happy. Embroidery is easy to do and gives a handmade feel.
Using Accessories
Accessories make your toy dog unique. Add a tiny collar, scarf, or bow. Use fabric scraps or small ribbons. Attach them securely with stitches or glue.
These extras add color and style. They make your toy dog stand out. Accessories also give it a fun personality.
Finishing Touches
Finishing touches make your toy dog look complete and neat. These steps add durability and improve the toy’s appearance. Focus on small details to create a polished final product. Careful finishing ensures your handmade toy lasts longer and looks great.
Sealing The Opening
After stuffing the toy dog, close the opening carefully. Use a needle and thread that match the fabric color. Stitch with small, tight stitches for a clean finish. Make sure the stuffing stays inside and the seam is strong. A well-sealed opening keeps the toy safe for play.
Final Adjustments
Check the toy dog for loose threads or uneven parts. Trim any extra fabric or threads to tidy the edges. Shape the toy by gently adjusting the stuffing where needed. Sew on any small parts like eyes or nose securely. These small fixes make your toy dog look perfect and ready to enjoy.
Care And Maintenance
Toy dogs need care to stay clean and last long. Regular maintenance keeps them looking good. It also protects your effort in making them.
Simple steps help your toy dog stay fresh and strong. A little care goes a long way in preserving your creation.
Cleaning Your Toy Dog
Dust and dirt can harm the fabric and colors. Use a soft brush to remove loose dirt. For stains, gently spot clean with mild soap and water. Avoid soaking the toy dog to keep the stuffing dry. Let it air dry completely before handling again. Regular cleaning keeps the toy dog safe for children and pets.
Repair Tips
Small tears can get worse if ignored. Use a needle and thread to fix rips quickly. Match thread color to keep repairs invisible. Check seams often for loose stitches. Replace missing eyes or noses with craft supplies. Secure any loose parts firmly to avoid choking hazards. Timely repairs extend the toy dog’s life and charm.
Frequently Asked Questions
What Materials Do I Need To Make A Toy Dog?
You need fabric, stuffing, thread, scissors, and a needle. Optional items include buttons for eyes and fabric paint.
How Long Does It Take To Make A Toy Dog?
Making a toy dog usually takes 1 to 3 hours. Time varies by design complexity and skill level.
Can Beginners Easily Make A Toy Dog?
Yes, beginners can create simple toy dogs. Start with basic shapes and simple sewing techniques for best results.
How Do I Make My Toy Dog Durable?
Use strong fabric and double-stitch seams. Avoid small parts that can easily detach or be swallowed.
Conclusion
Making a toy dog can be fun and simple. You only need a few materials and some patience. Follow the steps carefully to create a cute toy dog. Enjoy the process and add your own style. This project suits all skill levels.
Crafting toys helps improve creativity and focus. Share your toy dog with friends or keep it as a gift. Try different colors and shapes next time. Keep practicing, and your skills will grow. Have fun making your own special toy dog!