

Looking for a fun and creative way to spoil your furry friend? Making a dog toy plushie yourself is easier than you think—and it’s a great way to give your pup a special, one-of-a-kind toy.
Imagine the joy on your dog’s face when they get to play with something made just for them, safe and soft. In this guide, you’ll discover simple steps to create a durable, cuddly toy that your dog will love. Ready to get started?
Keep reading, and you’ll have your own handmade dog toy plushie in no time!
Materials Needed
Gathering the right materials is key to making a safe and fun dog toy plushie. Using good quality supplies ensures your toy lasts longer and stays safe for your pet. Below are the main materials needed to create a soft, durable toy your dog will love.
Fabric Choices
Choose fabrics that are soft but tough. Fleece and denim are great options. They resist tears and are comfortable for dogs to chew. Cotton can work but may not last as long. Avoid fabrics that shed easily or have loose fibers.
Stuffing Options
Use stuffing that is safe for pets. Polyester fiberfill is a common choice. It is soft, lightweight, and washable. You can also use old fabric scraps as stuffing. Avoid beads, foam, or anything small that dogs can swallow.
Tools Required
Basic tools make the process easier. You will need scissors to cut fabric. A needle and thread or a sewing machine to sew pieces together. Pins help hold fabric in place. A marker or chalk can mark your cutting lines.
Selecting A Design
Choosing the right design is the first step to make a fun dog toy plushie. The design sets the tone for the whole project. It affects how easy or hard the making process will be. Simple designs often work best, especially for beginners. Complex shapes can be tricky and take longer to sew. Picking a design that fits your skill level helps you finish the toy faster and enjoy the process more.
Simple Shapes For Beginners
Start with basic shapes like circles, squares, or triangles. These shapes are easy to cut and sew together. A circle can become a cute ball or a round animal face. Squares and triangles can form ears, paws, or body parts. Simple shapes make stuffing and stitching easier. They also reduce mistakes and stress. Beginners will find joy in finishing a simple project quickly.
Inspiration Ideas
Look around for ideas to spark creativity. Toys your dog already loves can inspire your design. Animals, fruits, or favorite objects make great plushie themes. Think about what your dog likes to chew or carry. Simple cartoon characters or nature shapes also work well. Sketch a few ideas on paper before choosing one. Inspiration helps create a toy your dog will enjoy and you will be proud of.
Cutting The Fabric
Cutting the fabric is a key step in making a dog toy plushie. Accurate cuts ensure the toy fits together well. Careful cutting helps avoid wasting fabric. It also makes sewing easier and the final toy look neat. Take your time and prepare your tools before starting.
Measuring And Marking
Start by measuring the fabric according to your pattern. Use a ruler or measuring tape for accuracy. Mark the fabric with a pencil or fabric chalk. Draw clear lines on the fabric where you need to cut. Double-check measurements to avoid mistakes. Mark both sides if the fabric is thick.
Tips For Precise Cutting
Use sharp fabric scissors for clean cuts. Cut slowly and follow the marked lines closely. Keep the fabric flat on a cutting surface. Avoid lifting the fabric while cutting. Cutting one layer at a time helps maintain control. Use weights or pins to hold the fabric in place.
Sewing The Pieces
Sewing the pieces of your dog toy plushie is a key step. This stage brings your design to life. You join fabric parts carefully to make a strong toy. The stitches must hold well to withstand playtime. Precise sewing also gives the toy a neat, finished look. Follow simple techniques for best results.
Basic Stitch Techniques
Start with the running stitch. It is a simple, straight stitch. Use it to join two fabric edges. Keep stitches small and even for strength. Another good stitch is the backstitch. It is stronger and perfect for seams. Insert the needle back into the fabric behind the last stitch. This stitch holds better during rough play. Tie knots securely at the start and end. This stops stitches from coming undone.
Using A Sewing Machine Vs Hand Sewing
A sewing machine speeds up the process. It creates even, tight stitches fast. Use a machine for straight seams and thick fabric. Adjust the machine settings for your fabric type. Hand sewing gives more control on curves and small parts. It is easier for beginners or small projects. Take your time to keep stitches neat. Both methods work well for making plush dog toys.
Stuffing The Plushie
Stuffing the plushie is a key step in making a soft dog toy. It gives the toy its shape and makes it fun to play with. Using the right amount of stuffing helps the plushie last longer and stay safe for your pet.
Choosing the right stuffing is important too. Soft stuffing makes the toy comfy, but too much can make it hard or stiff. Too little stuffing causes the toy to be floppy and less fun.
Choosing The Right Amount
Start by adding small amounts of stuffing inside the plushie. Press the stuffing gently to spread it evenly. The toy should feel soft but firm. Avoid overfilling. Overstuffed toys can burst or hurt your dog’s teeth. Underfilled toys lose their shape quickly.
Ensuring Durability
Use strong stuffing that holds shape well. Polyester fiberfill is a good choice. Avoid loose materials that can leak out. Pack stuffing tightly near edges and seams. This prevents the toy from tearing easily. Sew the plushie tightly and double stitch for extra strength. Durable toys last longer and keep pets safe.
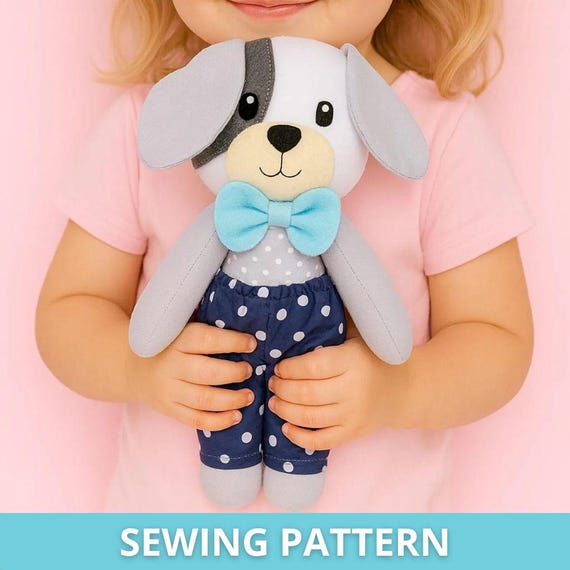
Credit: www.etsy.com
Adding Finishing Touches
Adding finishing touches to your dog toy plushie brings it to life. These small details make the toy fun and safe for your pet. Focus on simple steps that improve both look and durability. Careful work here means your dog will enjoy the toy longer.
Attaching Features
Start by sewing on eyes, nose, and ears firmly. Use strong thread to avoid loose parts. Avoid buttons or small pieces that pets can swallow. Felt or embroidered features work best for safety. Double stitch each feature for extra hold. Check each part after sewing to ensure it is secure.
Decorative Elements
Choose soft ribbons or fabric scraps for decoration. Keep decorations flat and stitched tightly to the plushie. Avoid sharp or hard materials that could hurt your dog. Simple patterns like stripes or dots add charm. Use bright, contrasting colors to catch your pet’s attention. Always test decorations for strength before giving the toy to your dog.
Safety Tips For Dog Toys
Making a dog toy plushie is fun and rewarding. Safety is the key to keep your dog happy and healthy. Use safe materials and design to avoid accidents. This section covers important safety tips for dog toys.
Non-toxic Materials
Choose fabrics and stuffing that are safe for dogs. Avoid materials with harmful chemicals or dyes. Look for cotton, fleece, or felt that is soft and non-toxic. Use pet-safe glue or sew parts instead of using toxic adhesives. Check labels to confirm the material is safe for pets.
Avoiding Choking Hazards
Small parts can cause choking or blockages. Do not add buttons, beads, or plastic eyes to the toy. Sew all parts tightly to prevent pieces from coming loose. Use strong thread and double-stitch to make the toy durable. Avoid stuffing that can spill out easily. Always supervise your dog during playtime.

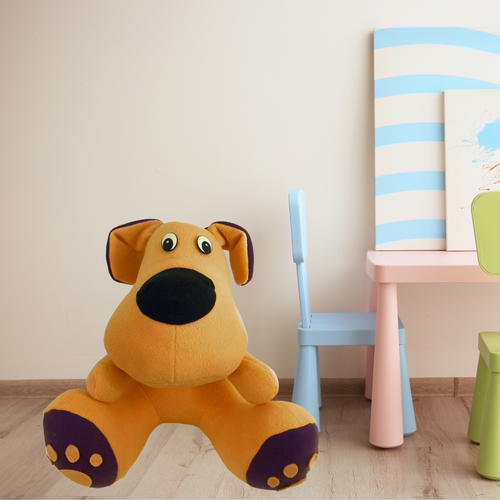
Credit: smart.dhgate.com
Caring For Your Dog Toy Plushie
Caring for your dog toy plushie keeps it safe and fun for your pet. Regular care helps your plushie last longer. It also keeps your dog healthy by reducing dirt and germs.
Simple steps can protect your toy from damage. Clean it often and fix small problems fast. This way, your dog enjoys a fresh, soft toy every time.
Cleaning Instructions
Remove loose dirt by shaking or brushing the toy. Spot clean stains using mild soap and warm water. Rinse well to avoid soap residue. Let the plushie air dry completely before giving it back to your dog. Machine wash only if the toy’s label allows it. Use a gentle cycle and cold water. Avoid harsh chemicals that can harm your dog or the fabric.
Repairing Wear And Tear
Check your plushie for holes or loose threads regularly. Sew small tears with a needle and strong thread. Use small stitches to keep the repair neat. Replace any missing or loose parts like eyes or noses. If stuffing spills out, add new filling before closing the hole. Repairing quickly stops damage from getting worse. Your dog will enjoy a safer, more durable toy.
Credit: sewcutepatterns.com
Frequently Asked Questions
What Materials Are Needed To Make A Dog Toy Plushie?
You need soft fabric, stuffing, thread, scissors, and a needle. Optional items include squeakers and safe dyes for added fun.
How Do I Ensure The Plushie Is Safe For Dogs?
Use non-toxic materials, avoid small parts, and securely sew all seams. This prevents choking hazards and keeps your pet safe.
Can I Customize The Plushie For My Dog’s Size?
Yes, adjust the plushie’s dimensions to suit your dog’s size. Larger dogs need bigger toys, while small dogs prefer smaller, softer ones.
How Long Does It Take To Make A Dog Toy Plushie?
Making a plushie typically takes 1 to 2 hours. Time varies based on design complexity and your sewing skills.
Conclusion
Making a dog toy plushie is fun and simple. You can use old clothes or soft fabric. Sewing by hand or machine works well. Add stuffing to make it soft and safe. Your dog will love a new, homemade toy.
It saves money and helps the environment too. Try different shapes and colors to keep your dog happy. Enjoy creating a special gift your pet will treasure. Keep making toys and watch your dog play with joy.


